Last Updated: 12 May 2022
The ASEE Peer Reporting Tool for the Salary Survey is now available. It is located on the https://survey.asee.org site, the same site the Salary Survey itself is hosted on.
In order to gain access, both of the following criteria must have been met:
- Your institution participated in the most recent Salary Survey
- You have paid for and we have received $500 for Peer Reporting Tool access
1. How to pay for Peer Reporting Tool access
To pay for the Peer Reporting Tool, log into the https://survey.asee.org site. (If you have any issues with this, please refer to our FAQ).
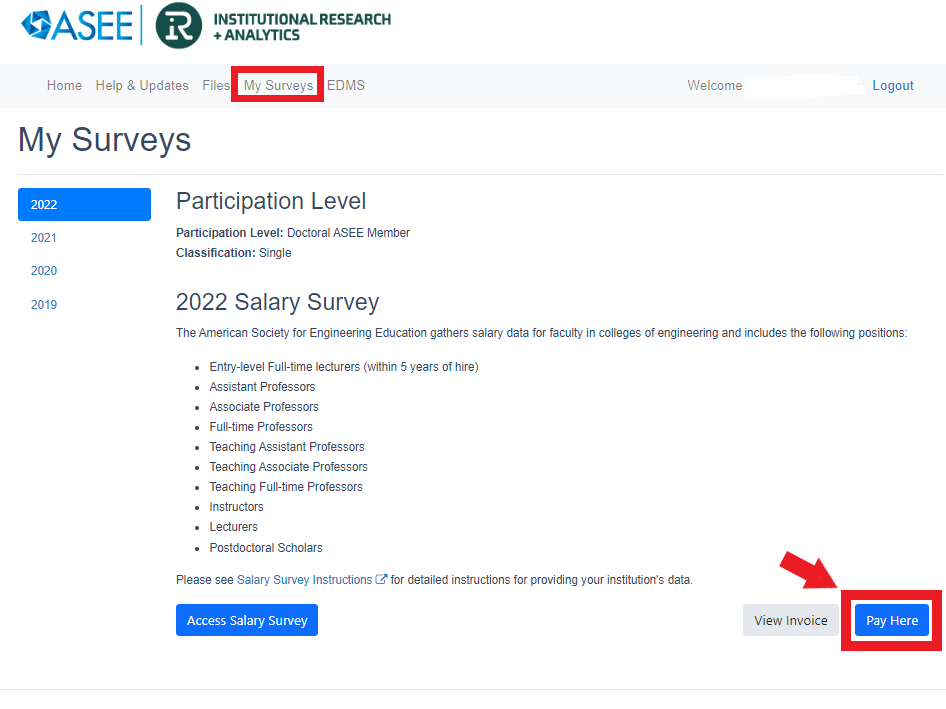
Once on the homepage, click on the “My Surveys” section. You will see an option to “Pay Here” in the 2022 Salary Survey area, pictured below:
On the following page, you may need to fill out some contact information. You will then need to select your payment method, pictured below:
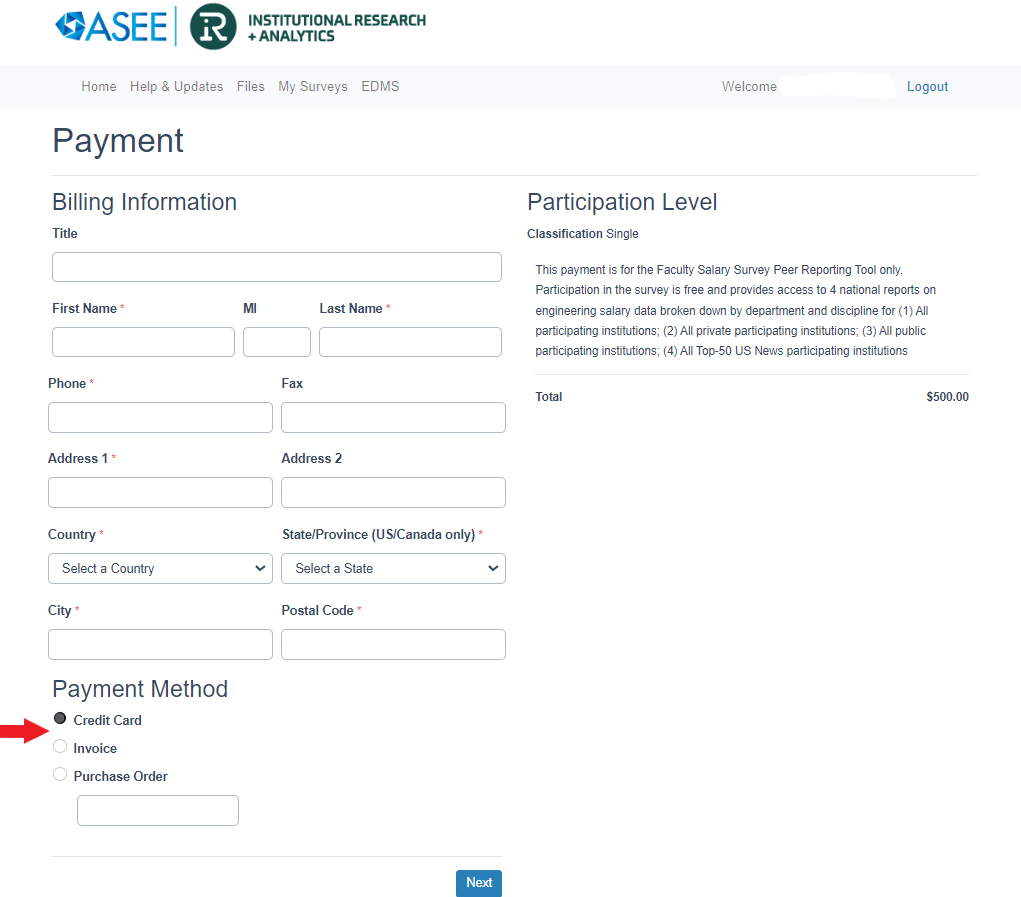
Please note that we must receive your payment in order to open access to this tool. Credit card will be immediate. Other methods may take time to reach us.
2. How to navigate to the Peer Reporting Tool
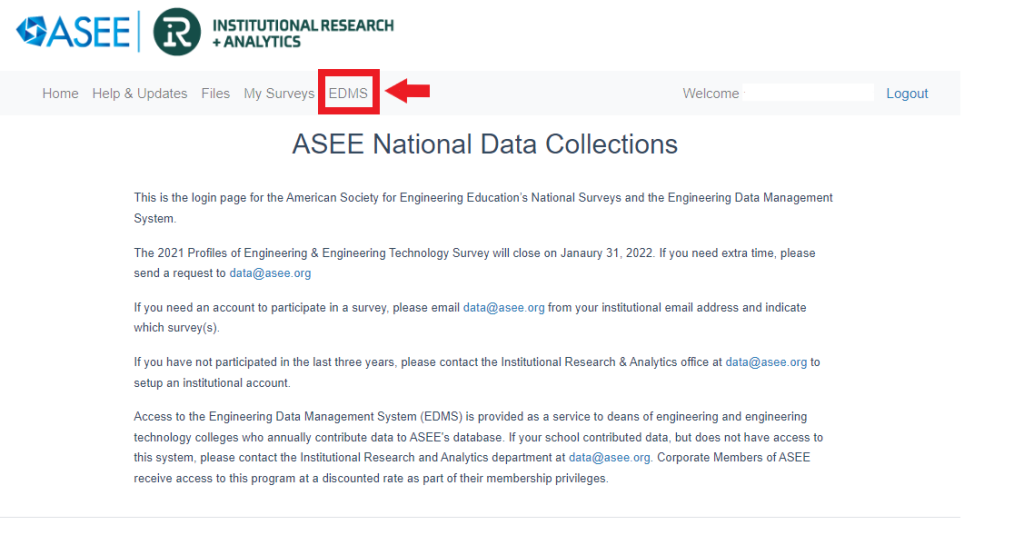
Once we have received payment for the tool, you will be able to access it by clicking on the EDMS at the top of your page, pictured below:
When you get into the EDMS page, the below pictured areas are what you will be using for the Peer Reporting Tool.
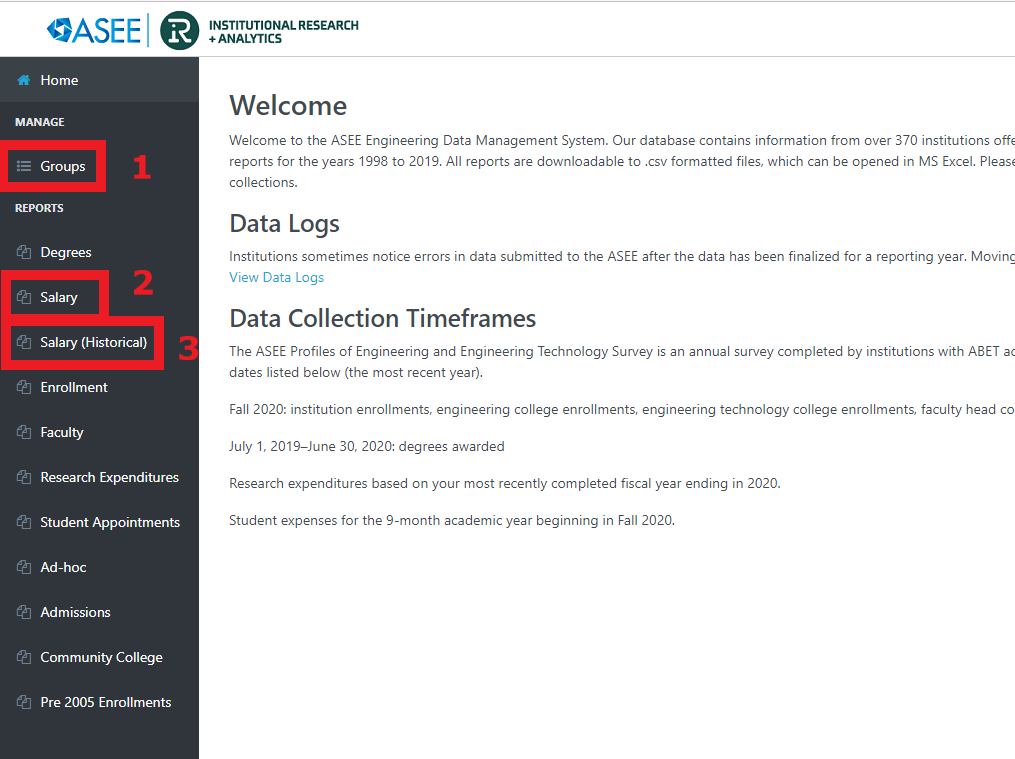
1 is the Groups tool. You will use this to create the peer groups to run reports on.
2 is the current Salary Survey data.
3 is historical Salary Survey data.
Below, we will go over each section.
3. How to use the Peer Reporting Tool
Group Page
When you click on Groups, you will see a page that looks similar to the below. It will have boxes for My Salary Survey Groups and My Salary Survey Groups (Historical):
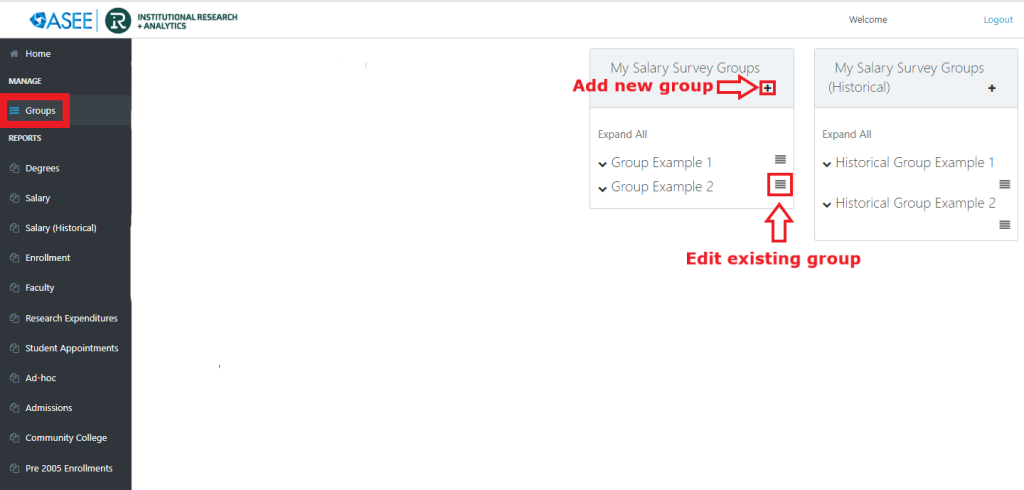
As pictured, you can click the plus sign to add a new group, and click the hamburger menu to edit an existing group.
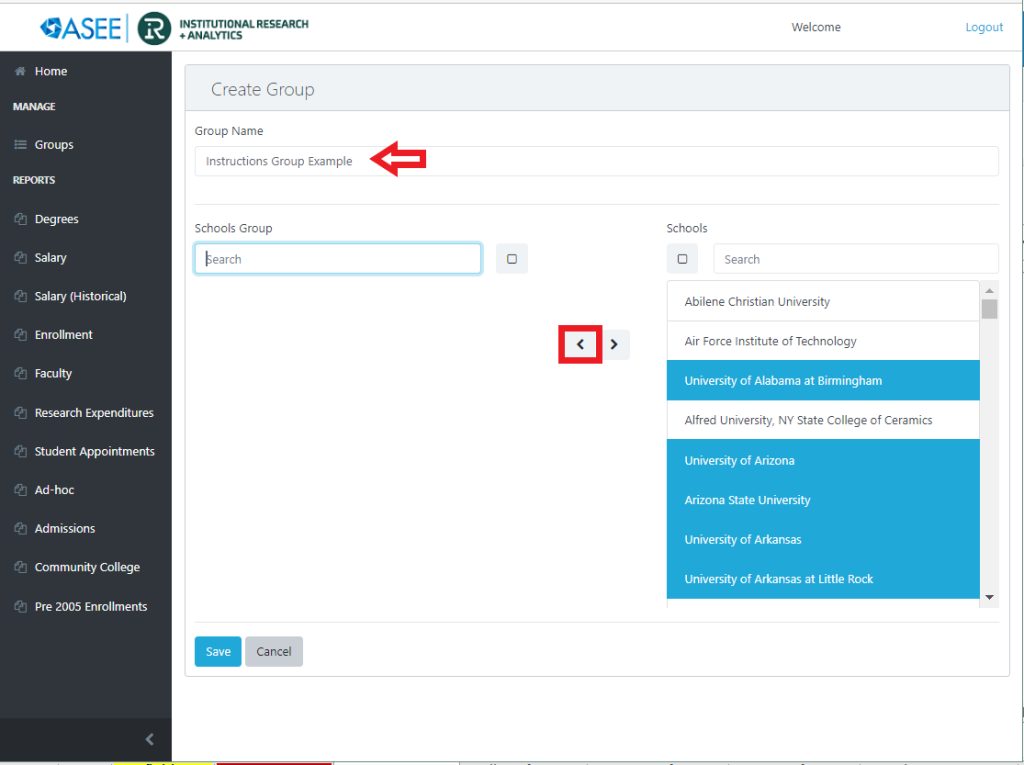
When you click into either of these options, you will be in the Create Group page. Make sure to name your group. There is a list of all the available institutions (schools) on the right. You will select the ones you want to add to your group (they will be highlighted in blue), then click the arrow to direct them over to the left, which is your group list. You can also use the search box above the list to search.
Here is a visualization:
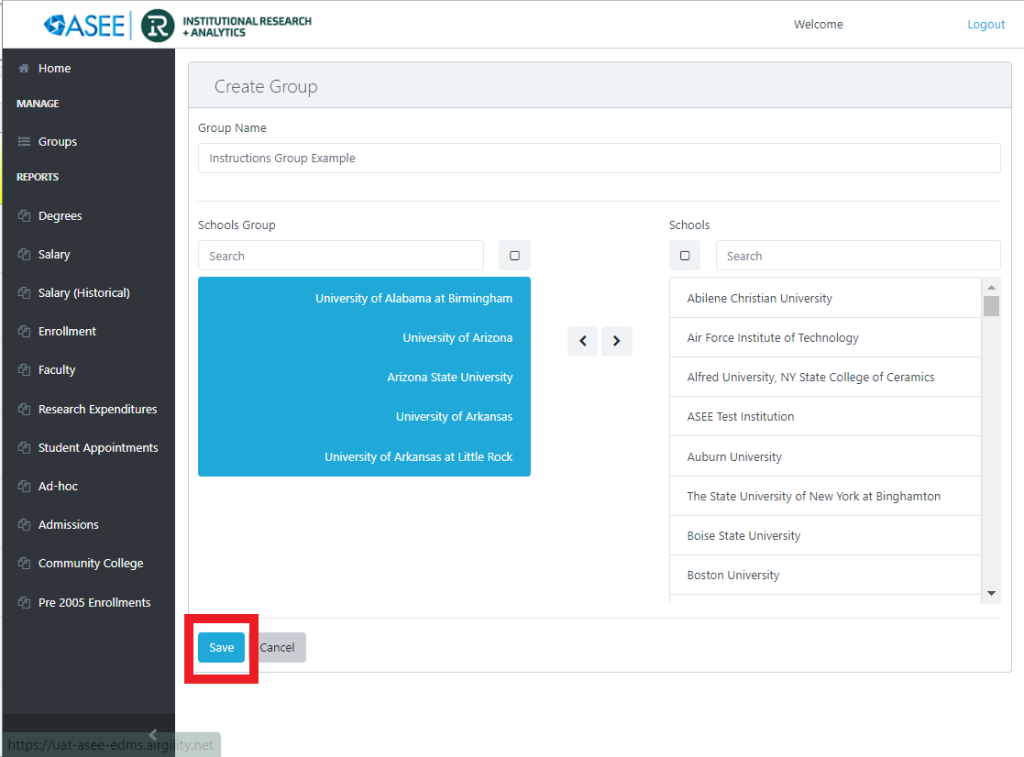
Please note that you will need a minimum of 5 institutions to create a group. The site will not allow you to create a group with less than 5 institutions.
You now have a group you can apply to a report. You can make multiple groups.
Salary Page
Here is the Salary Page. This is where you will run reports on the current year’s data. You will create a new report (and once you have done this, you can also edit an existing report). Here is the visualization:
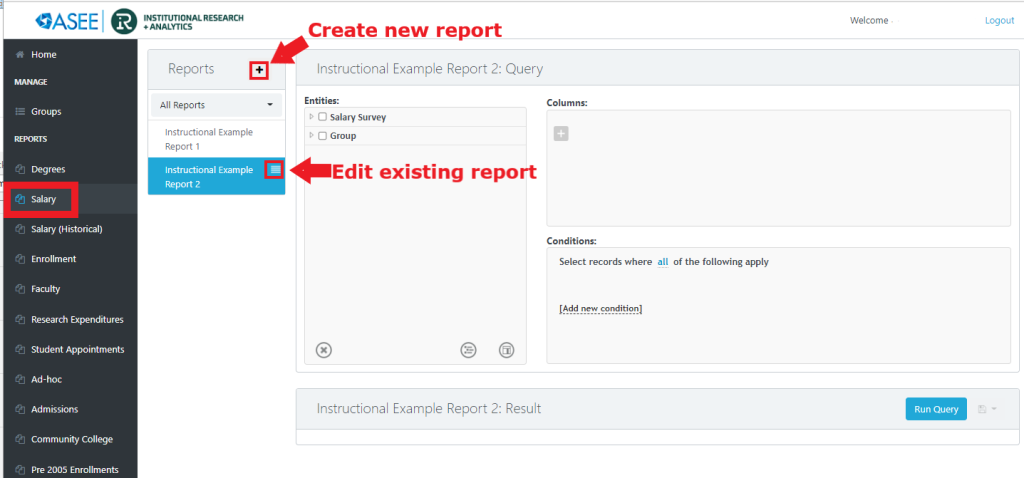
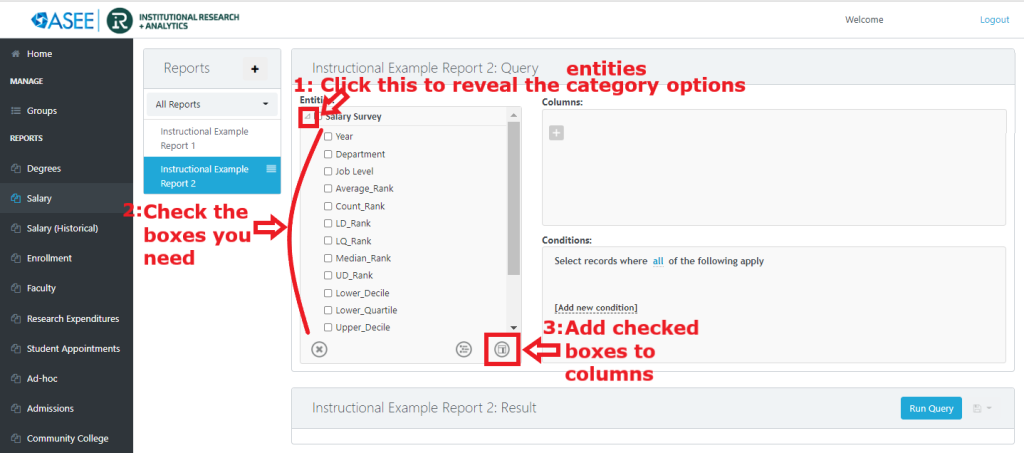
To complete a new report, you will need to add columns and conditions. You will select the columns you need from the list of Entities by checking the checkboxes, then add them to the Columns. Here is a visualization of how to do this:
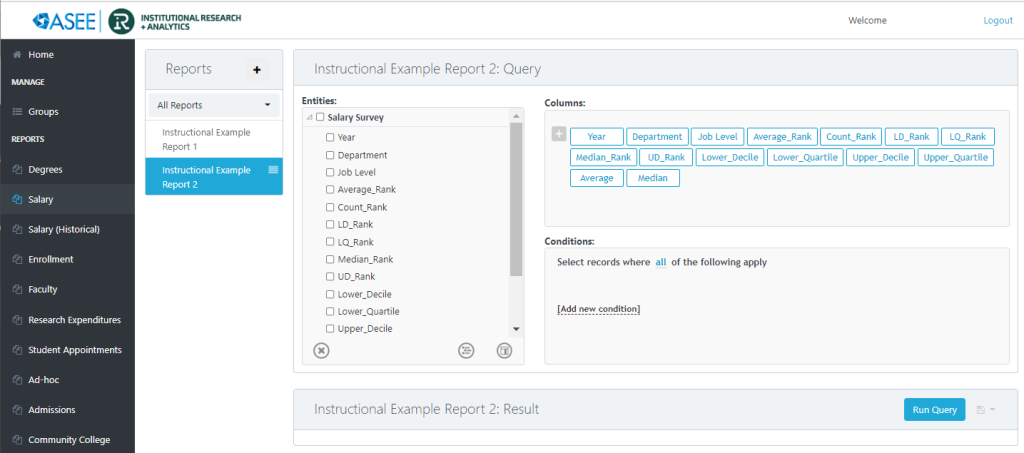
Here is what it will look like once you’ve added Entities to Columns:
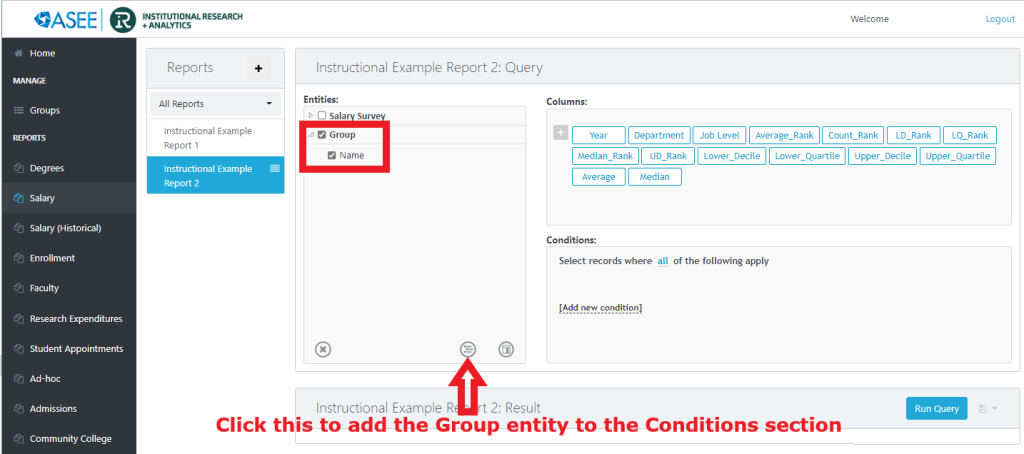
You will then need to add Conditions. For the Peer Reporting Tool, this will simply be the group(s) you created. You can do this by selecting Group, Name from the Groups entities checkbox, then adding it to the Conditions. Visualization below:
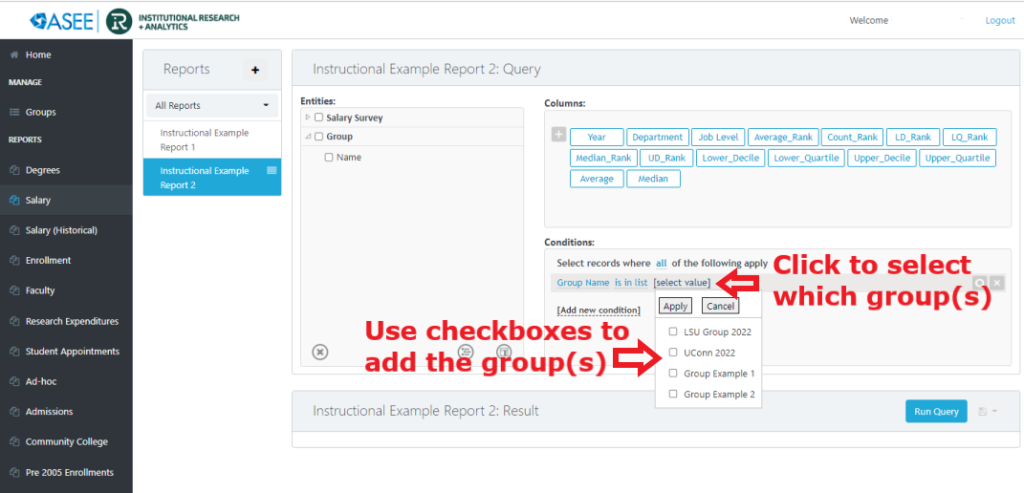
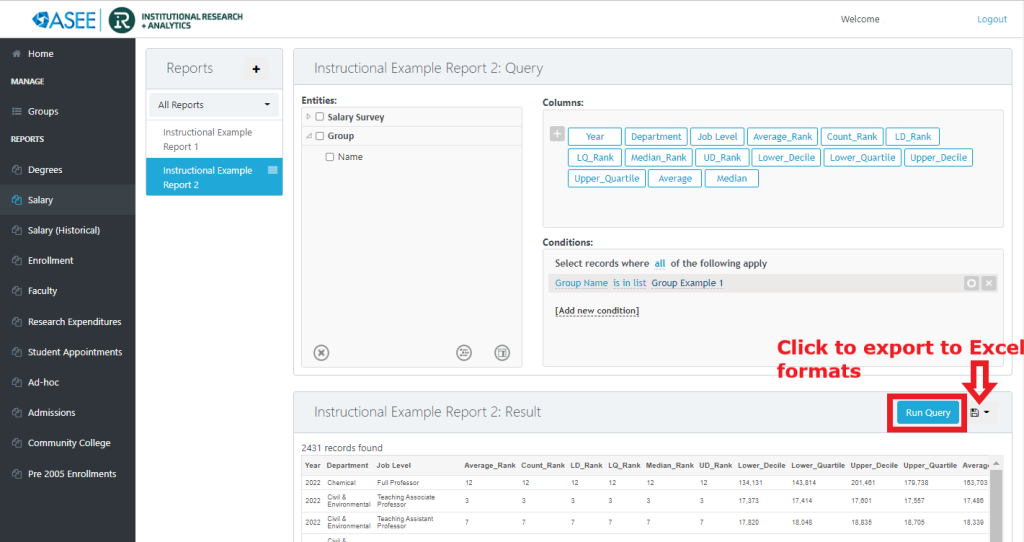
Once you have Columns and Conditions, you can run the report by clicking “Run Query.” You can then export the results into Excel formats by clicking the floppy disc icon. Visualization below:
Salary (Historical) Page
This is the same as the Salary Page. The difference is that it deals with historical (previous years) data. It functions the same as the Salary Page.
